OpenStreetMap Tiles for Dutch Projection EPSG:28992
In addition, OSM within The Netherlands is very detailed since Automotive Navigation Data (AND) has donated a complete road dataset for The Netherlands in 2007 to the OSM project. OSM maps are usually rendered as 256×256 tiles in a Spherical Mercator projection with the (unofficial) code EPSG:900913, a.k.a. the “Google Projection”. Spherical Mercator has an official designation of EPSG:3785 but you will mostly find EPSG:900913. Most countries however use local map-projections, mainly for better accuracy and calculations. Most Dutch mapping applications use the aforementioned Dutch RD projection, EPSG:28992 . Generating OSM tiles for EPSG:28992 requires some extra steps and has some gotchas you need to be aware of.
Below, I will not describe the setup of the entire toolchain needed to generate OSM map tiles with Mapnik , but just the steps that are specific to our goal: generate OSM map tiles for extent of The Netherlands with the projection EPSG:28992. These steps were done on Ubuntu Linux 9.04 (Jaunty). So let’s take the seven steps!
Step 1: download OSM data
Since we only plan to generate tiles for The Netherlands, plus the fact that the projection EPSG:28992 will not even work around the world, we need only an extract for The Netherlands. I have downloaded this extract from http://hypercube.telascience.org/planet/planet-nl-latest.osm.gz, but at the time of this writing this file was not present. Best is to go to http://wiki.openstreetmap.org/wiki/Planet.osm to find a suitable download server. Unpack planet-nl-latest.osm.gz. The resulting XML file planet-nl-latest.osm is around 4.5 GB.
Step 2: import OSM data in PostGIS
Use osm2pgsql
to import the Planet XML file into the PostgreSQL/PostGIS database. Since the standard version from the Ubuntu repository gave errors I have built a custom version of osm2pgsql from SVN (rev. 20274) using these steps:
1#!/bin/bash
2
3sudo apt-get install build-essential libxml2-dev libgeos-dev libpq-dev libbz2-dev proj
4mkdir /opt/osm/osm2pgsql
5cd /opt/osm/osm2pgsql
6svn export http://svn.openstreetmap.org/applications/utils/export/osm2pgsql svn-20274
7sed -i 's/-g -O2/-O2 -march=native -fomit-frame-pointer/' Makefile
8make
9make install
Import the OSM file with this command line:
1osm2pgsql --slim -c -E EPSG:4326 -d georzlab -U postgres -W -H localhost S /opt/osm/osm2pgsql/svn-20274/default.style /path/to/planet-nl-latest.osm
Note the use of EPSG:4326 (standard lon/lat projection) to store data in the DB. Maybe I could have used the default EPSG:900913. The --slim option was needed to prevent errors.
Step 3: install Mapnik
An install of Mapnik , the map tile renderer, version 0.7.0 from http://svn.mapnik.org/tags/release-0.7.0 was done. Installing Mapnik itself involves many steps. These are described in many places, such as here and for Ubuntu at http://trac.mapnik.org/wiki/UbuntuInstallation. Best is to have a Mapnik version as recent as possible.
Step 4: download and extract World Boundary files
This is a standard step in the Mapnik rendering process for OSM. Specific in our case is that we will extract only the area of The Netherlands from the World Boundary shape files. This is not just for efficiency purposes but required, otherwise rendering boundaries/geonames will silently fail (see below).
Two steps are required here:
- extract/clip the Netherlands’ bounding box and
- reproject extracted data to EPSG:28992.
Thanks to the wonderful geo-library GDAL/OGR
and the command ogr2ogr for vector data manipulations, this can be done in a script as follows:
 1#!/bin/bash
 2
 3# location of shape files
 4cd /var/kademo/data/osm/world_boundaries
 5
 6#
 7# Extract NL area to Dutch RD (EPSG:28992)
 8# get extent in EPSG:900913 from PostGIS:
 9#    select ST_Extent(ST_Transform(way,900913)) from planet_osm_line;
10#
11extent="311523.765594493 6555476.44574815 822461.515529216 7160903.43417988"
12srs=28992
13echo "Extract NL for EPSG:${srs}"
14/bin/rm `/bin/ls *${srs}*`
15ogr2ogr -f "ESRI Shapefile" -s_srs EPSG:900913 -t_srs EPSG:${srs}
16               -spat ${extent}  builtup_area_${srs}.shp builtup_area.shp
17ogr2ogr -f "ESRI Shapefile" -s_srs EPSG:900913 -t_srs EPSG:${srs}
18               -spat ${extent}  processed_p_${srs}.shp processed_p.shp
19ogr2ogr -f "ESRI Shapefile" -s_srs EPSG:900913 -t_srs EPSG:${srs}
20               -spat ${extent}  shoreline_300_${srs}.shp shoreline_300.shp
The extent in EPSG:900913 can be obtained from the data in PostGIS with the psql command:
1select ST_Extent(ST_Transform(way,900913)) from planet_osm_line;
This extra step came about after great help from the very active Dutch OSM mailing list . You can read the relevant thread here . It became clear that the clip/reproject step was necessary. The reason is most probably the Mapnik bug http://trac.mapnik.org/ticket/308.
Also make sure that you have the proper settings for EPSG:28992 in PROJ’s EPSG file, usually located in /usr/share/proj/epsg and make sure that this setting is actually used by ogr2ogr. Older versions of GDAL may use their own PROJ settings in their .csv files. The PROJ/PostGIS/GDAL issues around EPSG:28992
deserve a blog-post by themselves. At this moment even http://spatialreference.org/ref/epsg/28992
publishes wrong PROJ values. The issue mainly deals with the +towgs84 parameter, needed for reprojections, not being present.
Step 5: install and configure OSM Mapnik tools
This step involves changing the OSM-specific Python-scripts and the Mapnik XML configuration (“The Mapnik Map File”) for invoking Mapnik.
I installed SVN rev. 20274 with the command:
1svn export http://svn.openstreetmap.org/applications/rendering/mapnik
and ran:
1generate_xml.py
to generate a basic configuration.
The main step is making changes to the Mapnik map file osm.xml and its included files in inc/*.xml.inc. Below is relevant info.
We need to determine the extent for our tiling scheme. This is in general different from the extent of the dataset. It is the same extent that you will need in your tiling server like TileCache and your web client like OpenLayers . There is unfortunately no Dutch standard for this extent. I have used the following values
1EPSG:28992 (RD)       -65200.96,    242799.04  375200.96,   683200.96
2 EPSG:4326 (WGS84)     2.307,	       50.134         8.752,	       54.087
Change extent in datasource-settings.xml.inc:
12.307,50.134,8.752,54.087
Since our PostGIS data is in EPSG:4326 change inc/settings.xml.inc:
1<!ENTITY osm2pgsql_projection "&srs4326;" >
Edit inc/entities.xml.inc and add new XML entity for the Proj
definition for EPSG:28992.
1<!ENTITY srs28992 "+proj=sterea
2          +lat_0=52.15616055555555 +lon_0=5.38763888888889
3          +k=0.9999079 +x_0=155000 +y_0=463000
4          +ellps=bessel
5          +towgs84=565.237,50.0087,465.658,-0.406857,0.350733,-1.87035,4.0812
6          +units=m +no_defs" >
See also here
for the right “Proj” definition. The only change required in osm.xml is:
1<Map bgcolor="#b5d0d0" srs="&srs28992;" minimum_version="0.6.1">
There is no need to change Layer elements in osm.xml since they keep the projection from the entity osm2pgsql_projection.
In inc/layer-shapefiles.xml.inc change the names/projections to those of the extracted/reprojected shape files in Step 4. I have used XML entities as follows:
1<layer name="world" status="on" srs="&srs;">
2     <stylename>world</stylename>
3    <datasource>
4       <parameter name="type">shape</parameter>
5       <parameter name="file">&world_boundaries;/shoreline_300_&projection;</parameter>
6    </datasource>
7</layer>
With &srs; being EPSG:28992 and &projection; 28992.
Step 6: Generate Test Tile
The moment of truth ! We are going to generate a single map image to test all of our settings.
I made a copy of the Python file generate_image.py and modifed this file as follows:
 1if __name__ == "__main__":
 2    try:
 3        mapfile = os.environ['MAPNIK_MAP_FILE']
 4    except KeyError:
 5        mapfile = "osm.xml"
 6    map_uri = "/path/to/output/file.png"
 7
 8    # Map image bbox
 9    ll = (4, 52.3, 5, 52.5)
10
11    # zoomlevel
12    z = 10
13    imgx = 50 * z
14    imgy = 50 * z
15
16    m = mapnik.Map(imgx,imgy)
17    mapnik.load_map(m,mapfile)
18    prj = mapnik.Projection("
19     +proj=sterea +lat_0=52.15616055555555
20     +lon_0=5.38763888888889
21     +k=0.9999079 +x_0=155000 +y_0=463000
22     +ellps=bessel
23     +towgs84=565.237,50.0087,465.658,-0.406857,0.350733,-1.87035,4.0812
24     +units=m +no_defs")
25    c0 = prj.forward(mapnik.Coord(ll[0],ll[1]))
26    c1 = prj.forward(mapnik.Coord(ll[2],ll[3]))
27    if hasattr(mapnik,'mapnik_version') and mapnik.mapnik_version() >= 800:
28        bbox = mapnik.Box2d(c0.x,c0.y,c1.x,c1.y)
29    else:
30        bbox = mapnik.Envelope(c0.x,c0.y,c1.x,c1.y)
31    m.zoom_to_box(bbox)
32    im = mapnik.Image(imgx,imgy)
33    mapnik.render(m, im)
34    view = im.view(0,0,imgx,imgy) # x,y,width,height
35    view.save(map_uri,'png')
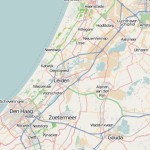
It was here that many of the issues solved above emerged. Below is the image of the first attempt with a silent failure resulting in the World boundary shapefiles being ignored.
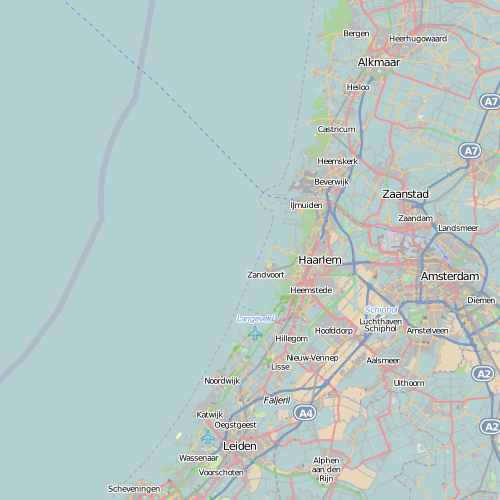
After using extract/clip (Step 4) the resulting image became as follows.

This looked much better. Now the final step is generating all tiles for The Netherlands. Normally this can be done with the OSM script generate_tiles.py, but this script is specific for the Google projection and should be rewritten for EPSG:28992 and the extent used above. For the time being I have used TileCache
to render and serve the tiles. This is the final step.
Step 7: render tiles with TileCache
Here I used a standard TileCache installation with the following configuration.
[osm_28992]
type=Mapnik
mapfile=/path/to/osm.xml
spherical_mercator=false
resolutions=860.160,430.080,215.040,107.520,53.760,26.880,13.440,6.720,3.360,
                     1.680,0.840,0.420,0.210,0.105,0.0525
metatile=yes
bbox=-65200.96, 242799.04, 375200.96, 683200.96
srs=EPSG:28992
Note that the bbox is the same as the extent in the Mapnik mapfile. Together with these specific resolutions the resulting zoom-levels will approach natural map scales used in The Netherlands like 1:25000. Tiles will be generated during requests. One can also explicitly generate tiles using the standard TileCache script tilecache_seed.py. I used:
su -s /bin/bash -c "tilecache_seed.py osm_28992 0 12" www-data
This will take quite some time also dependent on your TileCache installation (CGI/FastCGI). IMO it will be better to rewrite OSM generate_tiles.py. Below is a resulting excerpt from generated tiles.
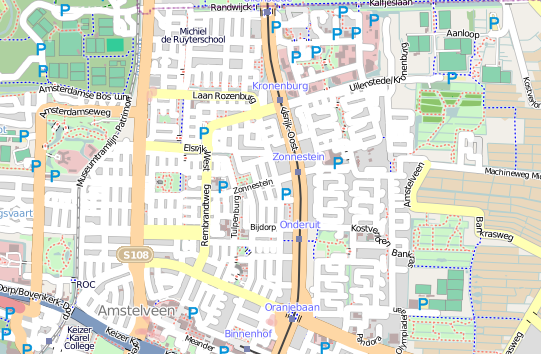
Somehow the map looks somewhat more busy than the standard OSM “Slippy Map”. This may be due to settings in osm.xml with respect to scales and showing/hiding layers.
Finally
I hope the above info is useful not just for those that need to generate tiles in Dutch projection but also for other projections. For example for an INSPIRE
project I have generated tiles in ETRS89 (EPSG:4258) with some slight modifications to the Mapnik config and TileCache config. Some further work could include more automation within the OSM Mapnik scripts/config in particular generate_tiles.py. Also, being able to use these tiles in GeoWebCache
would be very useful.